
Step 1: The openapi object (OpenAPI tutorial)
Before diving into the first step of the OpenAPI tutorial here, read the OpenAPI tutorial overview (if you haven’t already) to get a sense of the scope of this tutorial. In brief, this OpenAPI tutorial is unique in the following ways:
- This OpenAPI tutorial shows the spec in context of a simple weather API introduced earlier in this course.
- This OpenAPI tutorial shows how the spec information gets populated in two different tools and display frameworks: Stoplight and Swagger UI.
- This OpenAPI tutorial is a subset of the information in both the OpenAPI specification and the OpenAPI specification commentary. In other words, it’s not comprehensive of all the possible information in the spec.
- This OpenAPI tutorial covers the 3.0 version of the OpenAPI spec, which is the latest version. (Surprisingly, many tools still support only the 2.0 version.)
The root-level objects in OpenAPI spec
The OpenAPI 3.0 spec has eight objects at the root level. These eight objects have many nested objects inside them, but at the root level, there are just these parent objects:
By “root level,” I mean the first level in the OpenAPI document. This level is also referred to as the global level because some object properties declared here (namely servers and security) are applied to each of the operation objects unless overridden at a lower level.
The whole document (the object that contains these eight root-level objects) is called an OpenAPI document. The convention is to name the document openapi.yml.
“OpenAPI” refers to the specification; “Swagger” refers to the tooling (at least from SmartBear) that supports the OpenAPI specification.
Although one could approach the assembly of an OpenAPI document in many ways, I’ve decided to structure each step in this tutorial based on each of these root-level objects. You’ll see two approaches: one using Swagger working at a code-level, and another using Stoplight Studio working in a user interface.
Swagger
Before we jump into coding, let’s first talk about where you’ll write the code and what your options are.
Where to write your spec code
The easiest option is to use the online Swagger Editor. The Swagger Editor provides a split view: on the left where you write your spec code, and on the right, you see a fully functional Swagger UI display. You can even submit requests from the Swagger UI display in this editor.
The Swagger Editor will validate your content in real-time, and you will see validation errors until you finish coding the specification document. Don’t worry about the errors unless you see X marks in the code you’re working on.
I usually keep a local text file (using a text editor such as Atom or Sublime Text) where I keep the specification document offline, but I work with the document’s content in the online Swagger Editor. When I’m done working for the day, I copy and save the content back to my local file. Even so, the Swagger Editor caches the content quite well (just don’t clear your browser’s cache), so you probably won’t need your local file as a backup.
If you want to purchase a subscription to SwaggerHub, you could keep your spec content in the cloud (SwaggerHub has an editor almost identical to Swagger UI) associated with your personal login. SwaggerHub is the premium tooling for the open-source and free Swagger Editor.
Another option to work locally is to use Visual Studio Code with two extensions: openapi-lint and Swagger Viewer. These extensions let you work locally and preview a live version of Swagger. You can also download and run the Swagger Editor locally.
For the sake of simplicity, for the Swagger sections in this tutorial, we’ll just use the online Swagger Editor.
Add the openapi object
From the Swagger Editor and go to File > Clear editor. Keep this tab open throughout the OpenAPI tutorial, as you’ll be adding to your specification document with each step.
Add the first root-level property for the specification document: openapi. In the openapi object, indicate the version of the OpenAPI spec to validate against. The latest version is 3.0.2.
openapi: "3.0.2"
Until you add more information in here, you’ll see error messages and notes such as “No operations defined in spec!” To avoid these errors, add some placeholder info here like this:
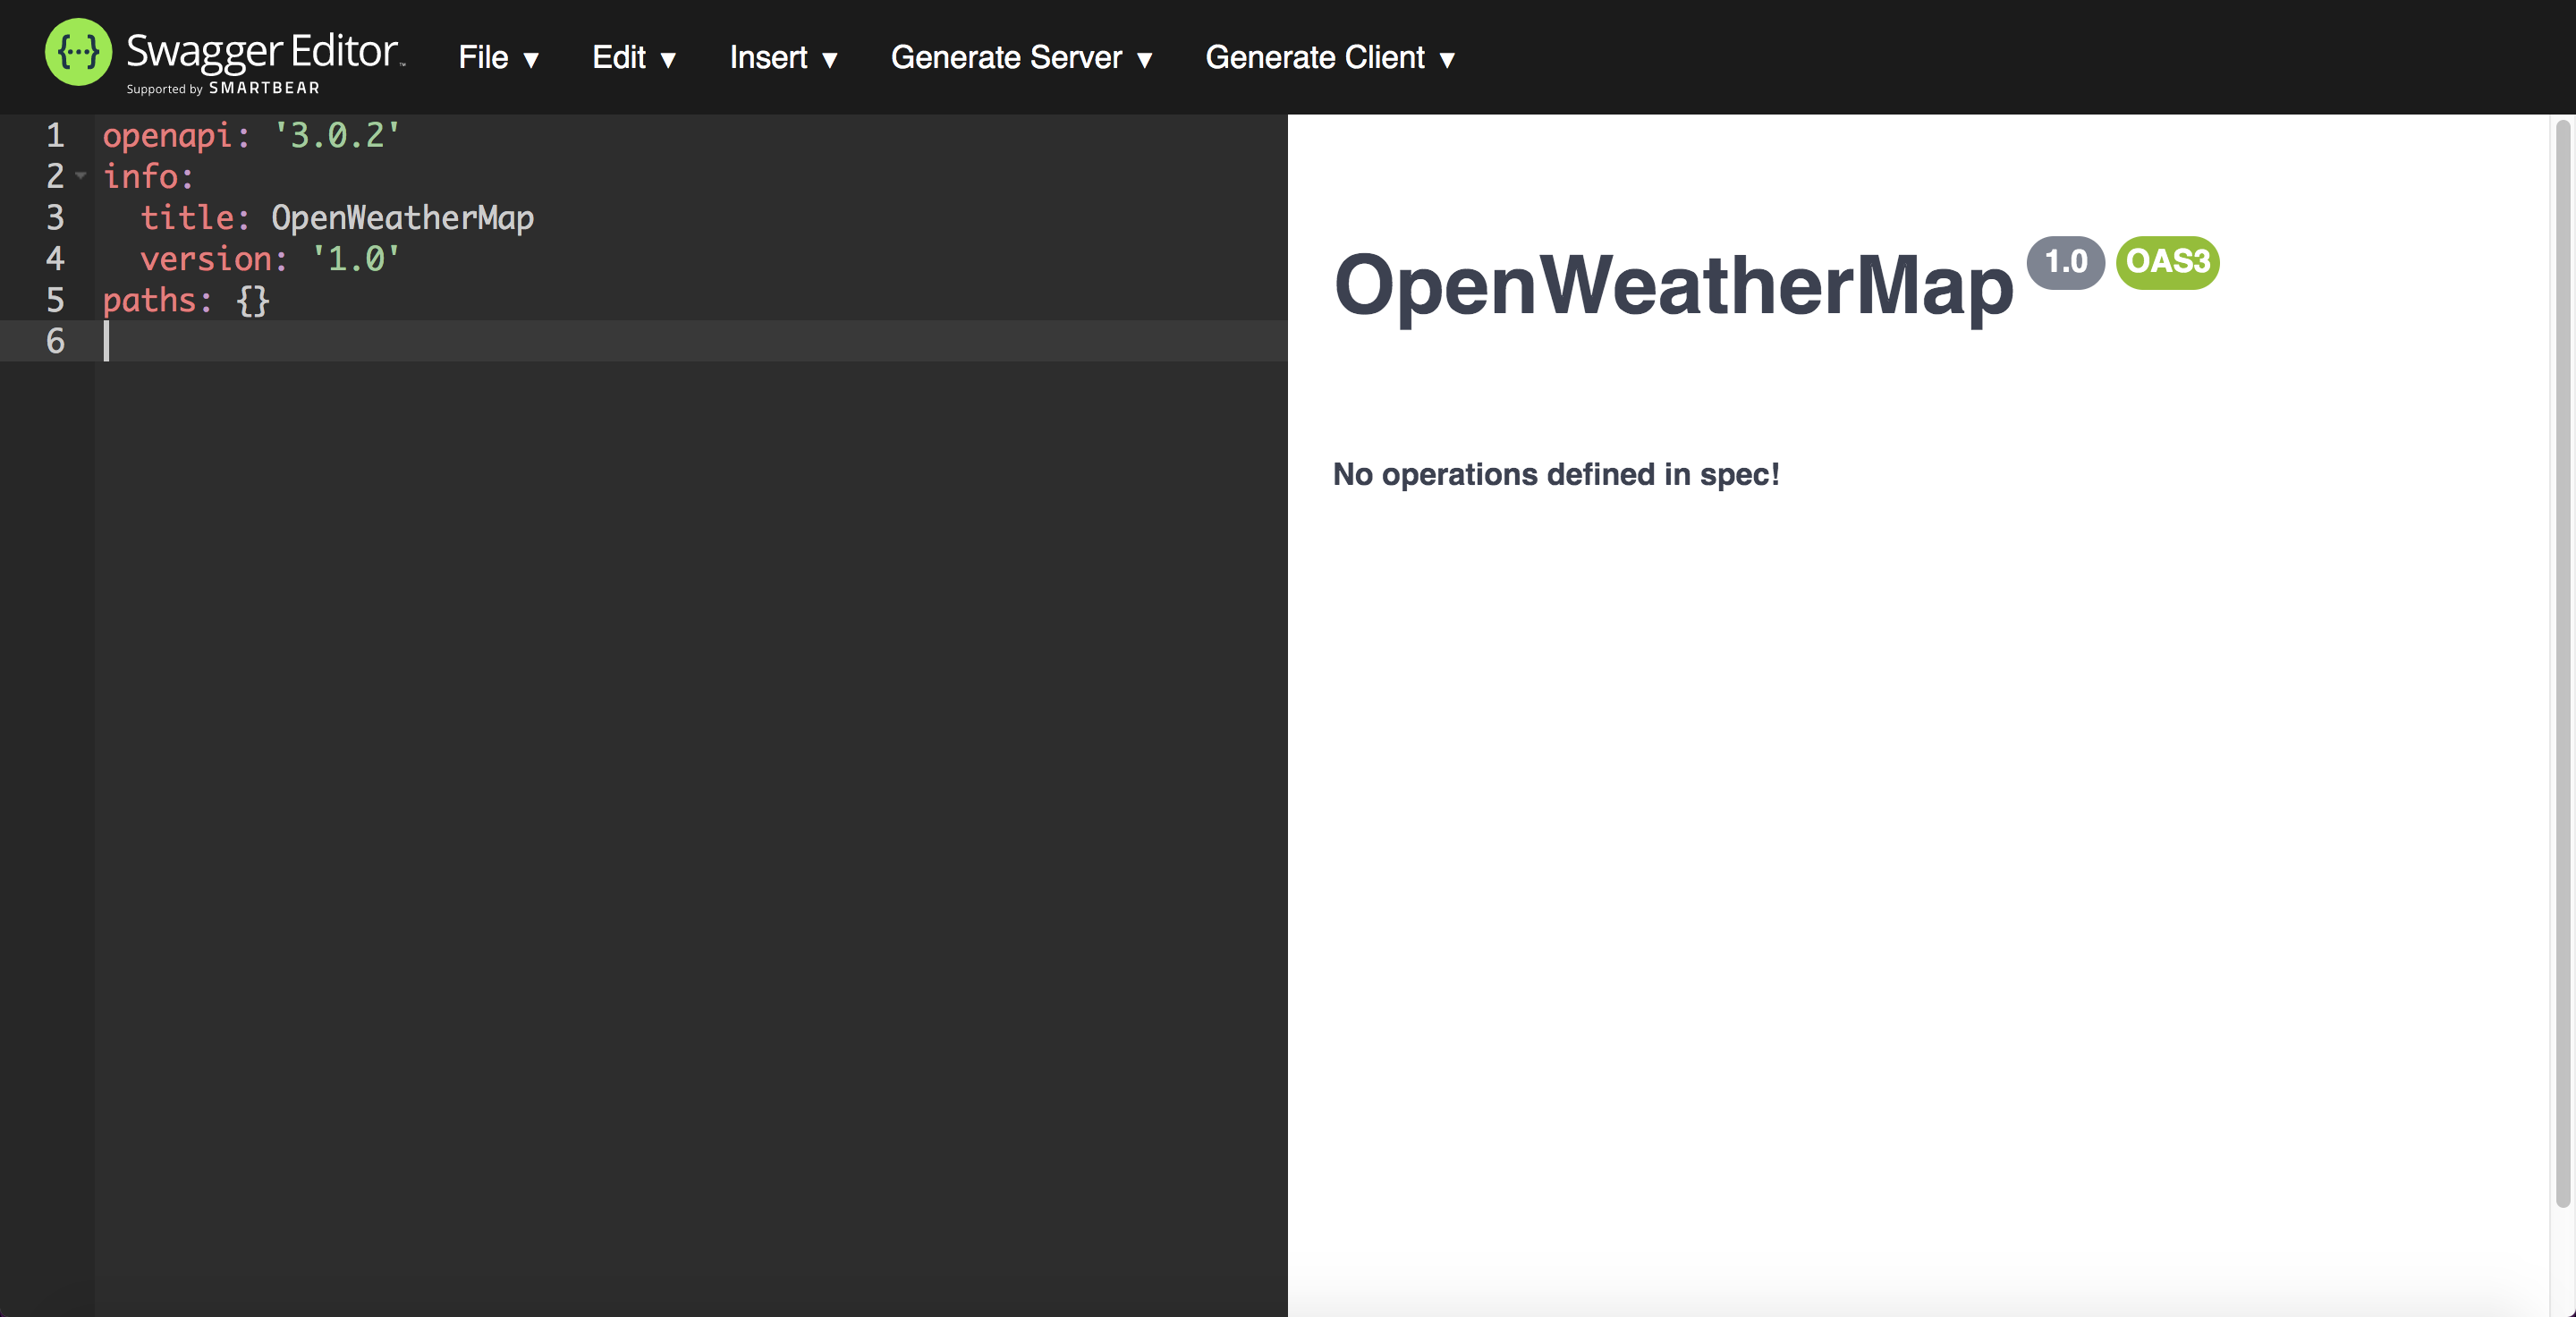
openapi: '3.0.2'
info:
  title: OpenWeatherMap
  version: '1.0'
paths: {}
The editor renders the display as follows.
If you get stuck, see the sample OpenAPI spec here for the fully working sample. This will help you spot and troubleshoot indentation or other errors.
On the backend, Swagger UI uses the 3.0.2 version of the spec to validate your content. In the above screenshot, the gray “1.0” version refers to the version of the API here, not the version of the OpenAPI spec.
There’s not much to the openapi object except to elaborate on the versions. OAS 3.0 was released on 2017-07-26, and OAS 3.0.2 was released on 10-08-2018 (see Version History). Much of the information and examples online, as well as supporting tools, often focus only on 2.0. Even if you’re locked into publishing in a 2.0 tool or platform, you can code the spec in 3.0 and then use a tool such as APIMATIC Transformer to convert the 3.0 spec to 2.0. You can also convert a spec from 2.0 to 3.0.
42/145 pages complete. Only 103 more pages to go.