Activity: Generate a Javadoc from a sample project
Javadoc is the standard output for Java APIs, and it’s somewhat effortless to build a Javadoc. The Javadoc is generated through something called a “doclet.” Different doclets can parse the Java annotations in different ways and produce different outputs. But by and large, almost every Java documentation uses the standard doclet. The Javadoc output will be familiar and welcome to Java developers.
Javadoc is supported by Oracle. Developers can integrate the Javadoc output directly into their IDE, which makes the documentation convenient and easily accessible. In fact, Javadoc is often delivered this way rather than deployed and uploaded to a server. Javadoc contains reference documentation only. You can’t add any conceptual help files into the output, nor change the layout.
- Generate a Javadoc
- Javadoc and error checking
- Play with Javadoc parameters
- Auto-building the Javadoc
Generate a Javadoc
In this activity, you’ll generate a Javadoc from the sample java project you downloaded earlier. If you want to preview the Javadoc that you’re going to build, you can view the output here.
- In Eclipse, go to File > Export.
- Expand Java and select Javadoc. Then click Next.
-
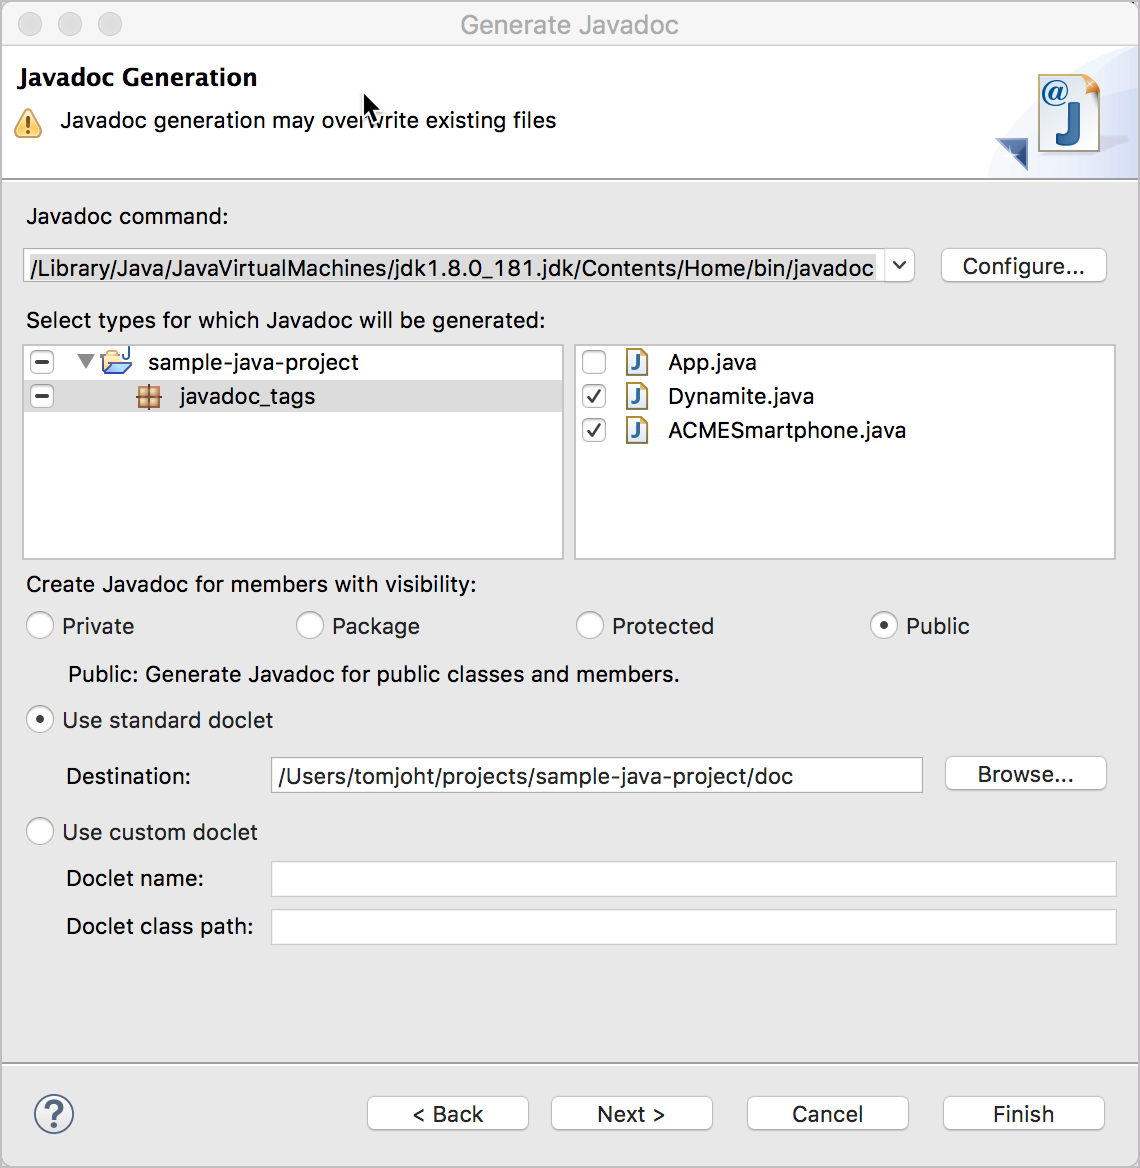
Select your project and package. Then in the right pane, select the classes you want to be included in the Javadoc — in this case, Dynamite.java and ACMESmartphone.java.

Generating a Javadoc Don’t select the
App.javaclass that contains yourmainmethod because you don’t need to provide Java documentation for your program; your Javadoc will provide documentation for the classes that developers might choose to use in their programs. In this sample project, themainmethod is included inApp.java, but it could have been included in a file named otherwise. -
Select which visibility option you want: Private, Package, Protected, or Public. Generally, you select Public.
Your API probably has a lot of helper or utility classes used on the backend, but only a select number of classes will be used by your developer audience. These classes are made public. It’s the public classes that your developer audience will use that form the API aspect of the class library.
- Make sure the Use standard doclet radio button is selected. (It’s selected by default.)
-
Click the Browse button and select the output location where you want the Javadoc generated. By default, it will be generated in the same project folder as your code, but in a subfolder called
doc. This way you can browse the Javadoc directly within your Eclipse IDE.For this activity, choose a different output location (such as a folder on your desktop or in your documents) other than the default. Reason being, the project already has the generated Javadoc in a docs folder, so you might not even realize that you’ve generated a Javadoc file because your new output will just overwrite the existing doc files.
When developers deliver Java libraries, they often include the doc directly in a distributed zip file that contains that JAR. Users are accustomed to looking in the doc folder for documentation.
-
Click Next and see additional configuration options.

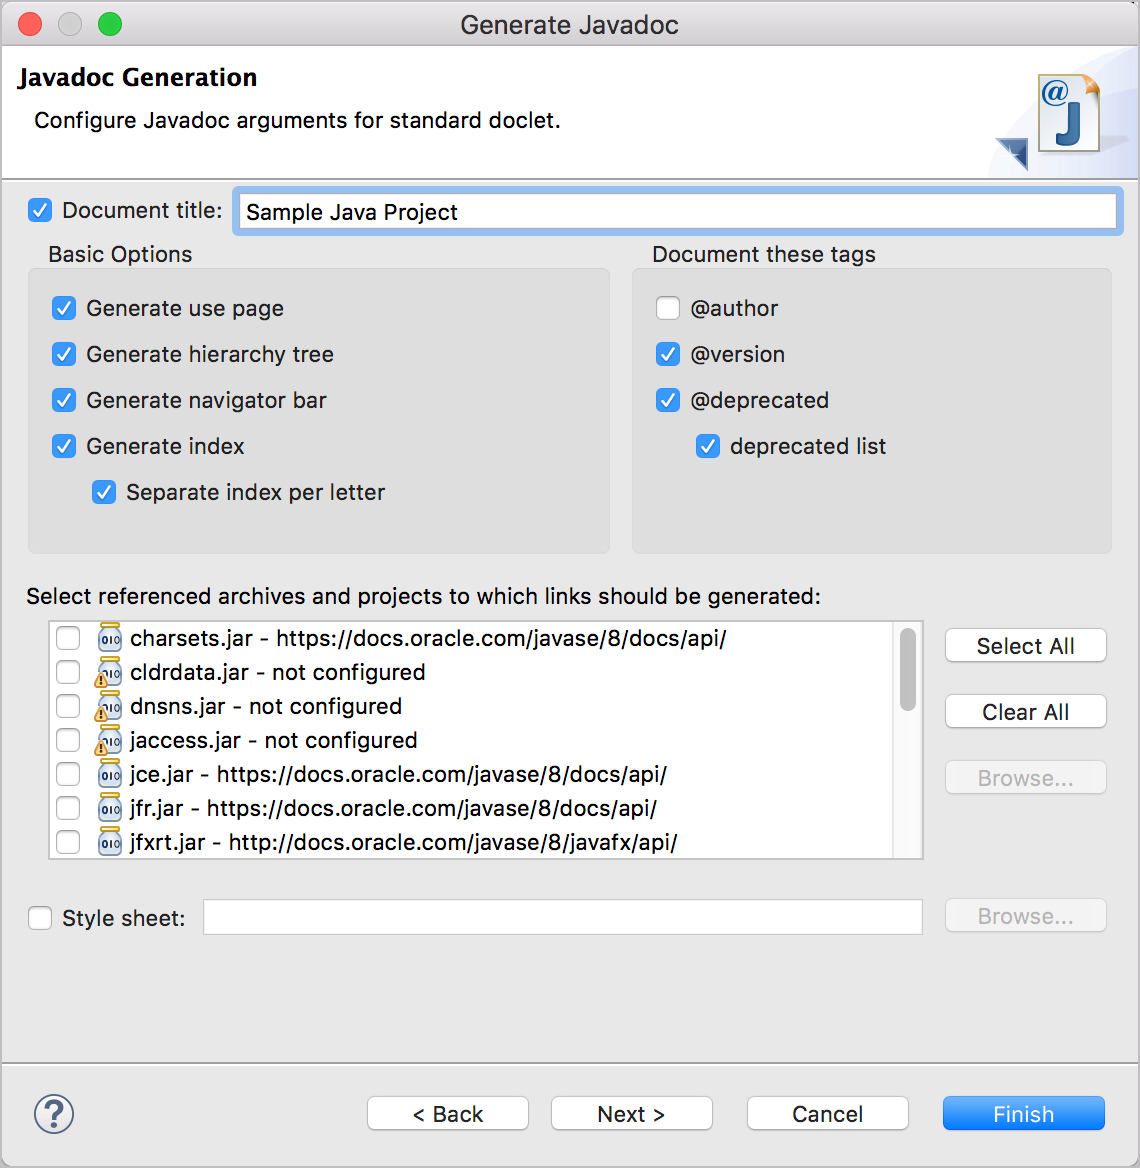
Javadoc next screen Here you can select if you want to omit some tags, such as @author and @deprecated. Generally, you don’t include the @author tag, since it may only be important internally, not externally. You can also select different options in the Javadoc frame. If you have a custom stylesheet, you can select it here. Most likely you would only make superficial style changes such as with colors.
-
Click Next.

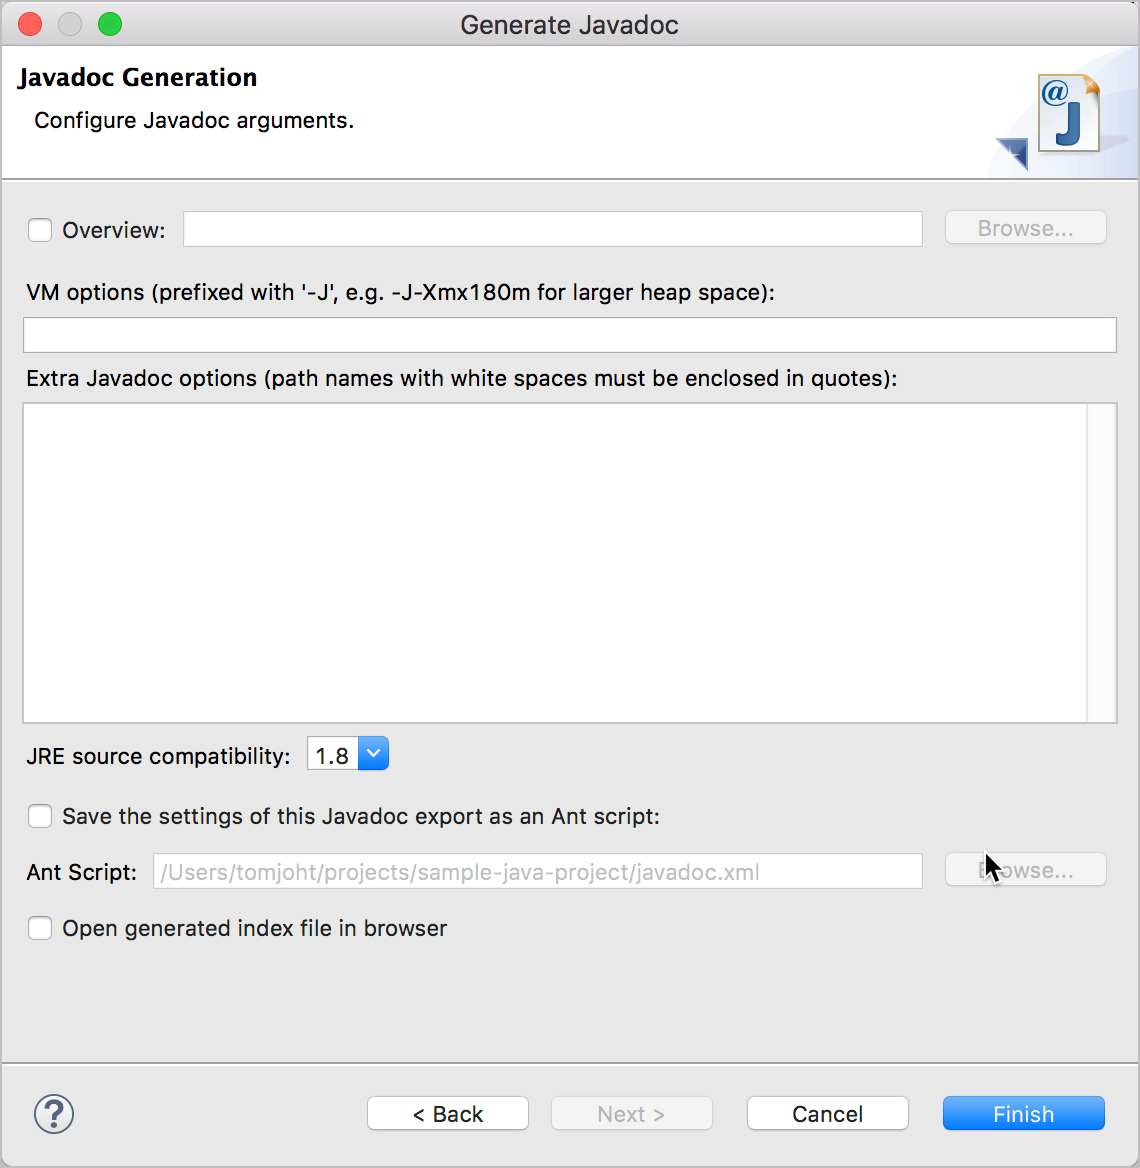
Overview page Here you can select an HTML page that you want to be your overview page in the Javadoc. You can select any HTML page, and it will be included in the index.
-
Click Finish.
If the Finish button isn’t available, it might be because Eclipse can’t find the right Javadoc executable. You can click Configure and browse to the file manually. On a MacBook Pro, the Javadoc file is at
/Library/Java/JavaVirtualMachines/jdk1.8.0_171.jdk/Contents/Home/bin/javadoc.If prompted to update the Javadoc location (which likely differs from your Eclipse workspace location), do so by clicking Yes to all.
Browse to the destination location and open the
index.htmlfile in your browser to view the files.If you had trouble building your Javadoc, you could view the output here.
Javadoc and error checking
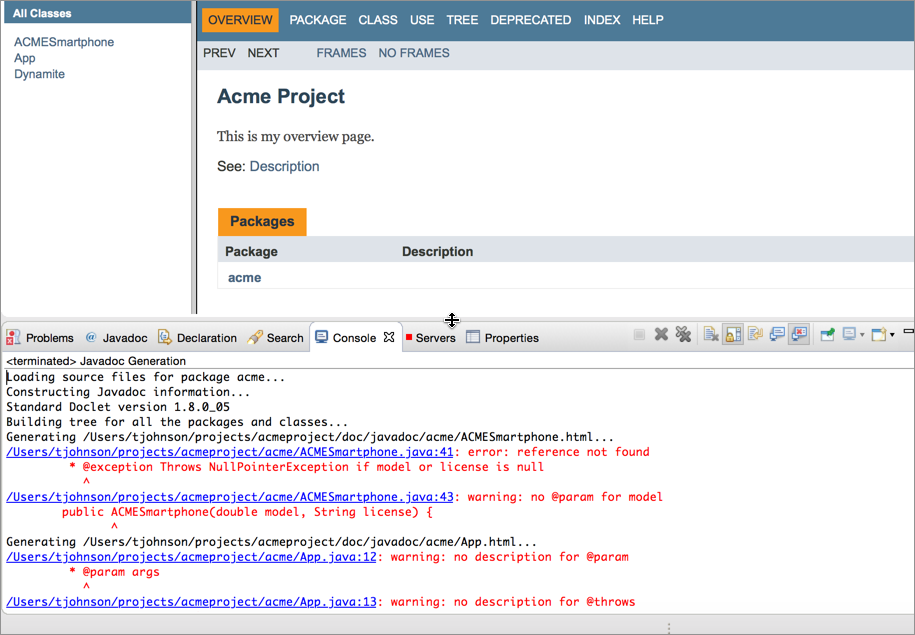
Javadoc also checks your tags against the actual code. If you have parameters, exceptions, or returns that don’t match up with the parameters, exceptions, or returns in your actual code, then Javadoc will show some warnings.

Play with Javadoc parameters
Try removing a parameter from a method and generate the Javadoc again. Make sure the console window is open so you can see the error warnings.
Auto-building the Javadoc
In most development shops, you’ll never manually create a Javadoc file as I’ve explained here. Javadoc allows you to build it from the command line by feeding it a configuration file. Most developers have a build management tool where they can configure outputs from their code, including Javadoc. If developers ask you to build the Javadoc, chances are their build management system might be somewhat primitive. However, it can be helpful to build the Javadoc output yourself (as I’ve explained here) to test and review the output before generating it through the build management tool.
119/145 pages complete. Only 26 more pages to go.
